There are some simple ways you can use to go about the Windows Print screen feature on Windows, you can take pictures by just pressing the PRINT SCREEN on some keyboards and that is called “Screen Capture”. The screen capture can be placed on a document or attached with an email. There are two types of Print screen capture you can take with Windows Print screen feature, these are : The entire window screen , and the active window. Some Keyboards have direct Print screen button. To copy the entire screen on Windows, simply press PRINT SCREEN. To print only the active window, simply Press ALT +print screen.
Take a Screen shot on Windows
To take a Screen Shot and save it as a picture on your computer, simply follow these simple steps:
Step 1 :Click on the window or screen you want to capture, Select and press ALT + PRINT SCREEN ( Hold down the Alt button) while pressing the print screen- the print screen can be found at the upper right corner of the keyboard- this depends on the type of the keyboard though.
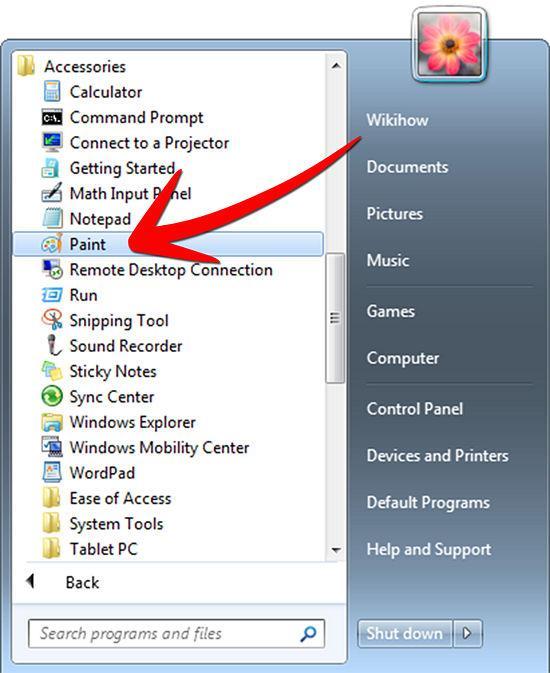
Step 2: Click on “Start”, select “Accessories” and click on “Paint”.
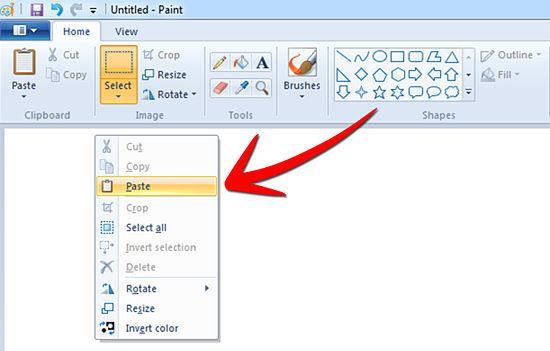
Step 3: You will be directed to the Paint window, click on “Edit” and then click “Paste”.
Step 4: Click “File” as soon as the image has appeared on the Paint window, click on the file and click “Save as” put the name of the new printed image, and you should see it on your Desktop (or the path you Specify).
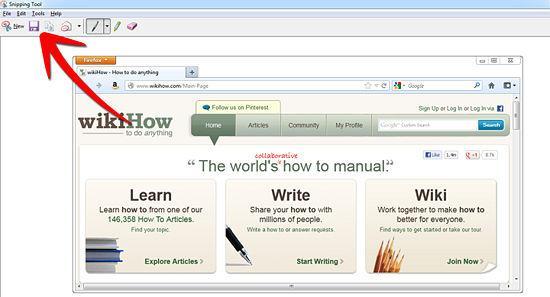
Alternatively, you can use a print screen feature on Windows with the help of a Snipping tool method; you can download this tool online.
How to use the Print Screen feature on Windows with a Snipping tool
It is easy to take Screenshots on windows with a snipping tool and is also referred to as “Screen Grab”. Use the techniques below to use Print Screen features on Windows;
Snipping tool method works perfectly with Windows 7 premium operating system, Windows Ultimate, Windows Vista, and Windows Professional. Print screen method will be the most suitable for other Windows and Mac operating systems.
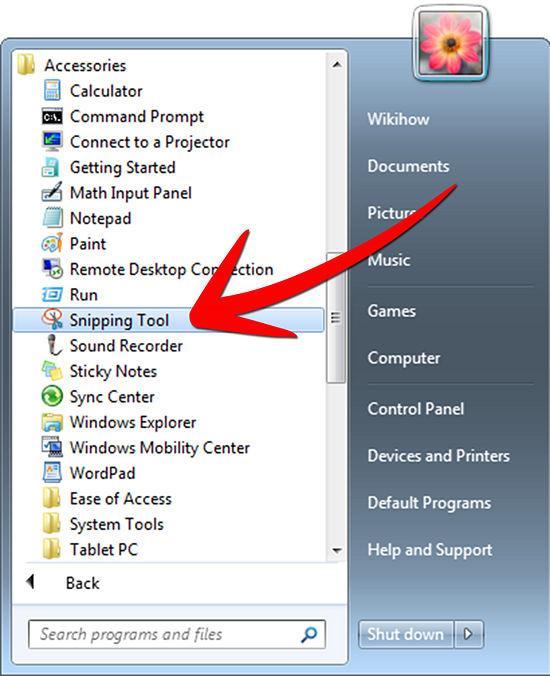
Step 1: Download the snipping tool online, locate it by clicking on “ Start” , All programs, select and click on “ Accessories’, and choose Snipping tool as shown in the picture below.

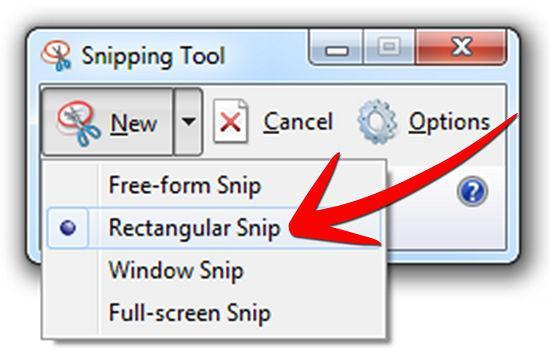
Step 2: Select the type of screen-shots or “Snips” you want to take – by default, the rectangular snipping is available. There are also other options such as Windows snip, free-form snip, and full-screen snip. The free form snip will allow you to draw an area that you want to print and you can’t take screen snips outside of what you have drawn. The rectangular snipping option allows you to draw a rectangular snip around the area or window you want to snip.
Windows snip will allow you to choose a window and take your screenshots, while full screen snips will allow you take snips of the whole screen – it works with all Windows Operating Systems.

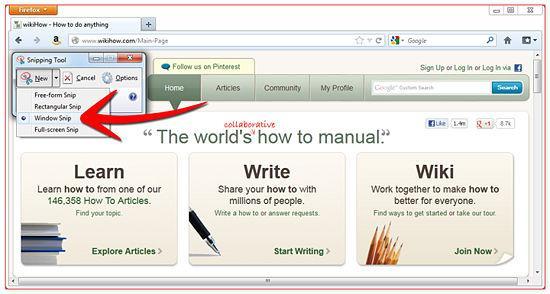
Step 3: Select the area on your screen that you want to capture. You can select a “Window snip” option or you can choose “ Full screen snip” if you want to capture the whole screen..

Step 4: Click on the save option (Floppy Disk Icon) to save the print screen capture , type in the name you want to save the screenshot with, and select “ save as type”. You may also need to read about some tips on the different types of files on the information folder.

How to use the full screen print feature on windows with a sniping tool
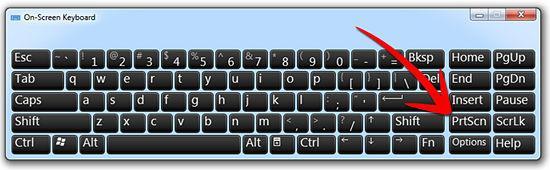
You can simply press the Print Screen button on your keyboard if it is available. The print screen button on the keyboard will be labeled as “prnt scrn” or “prnt scr”. This button is normally located close to the F12 button. On your normal laptop keyboard, you can access the windows screen print button by pressing and holding the “Fn” button and simultaneously clicking on the button with colored “prnt scrn” written as a subscript..

Use Windows screen print feature from your clipboard
Simply open the Microsoft paint from your start button, and click on “ All programs” and then click on “ Accessories”.

Step 2: Copy and Paste the screen onto the “Paints” Window click on the “ Select’’ tool at the top, and choose on “ Rectangular” option, right click on “ Canvas’ and select “Paste” and your screenshot will be automatically pasted on the canvas.
Step 3: You can alternatively post the screenshots on a word document. To do this, first of all, right click on the email page you are composing and select “Paste’.
Step 4: Hold down the “Ctrl” button and press the “V” button to paste.
The Print screen feature on Windows allows you to get pictures from other websites and use them for yourself.