The instructions on making a windows 8 bootable USB drive are very simple and straight forward, all you need is a USB flash drive with at-least 8 GB capacity. If you want to create a bootable USB flash drive, simply download Windows 7 USB/DVD download tool provided in the Microsoft store, and you can use the following command line tools to design your windows 8 bootable flash drive.
Using a command line to create windows 8 bootable USB drive
Step 1: Load the downloaded Windows 8 ISO image on your desktop or laptop PC (you can find this on the Microsoft store)
Step 2: Get your USB flash drive and format it
Step 3: Copy the windows 8 files unto the formatted USB flash drive.
Step 4: Make your USB flash drive bootable, and
Step 5: Install your windows 8 OS from the bootable flash drive.
Now, let’s talk about these steps in details.
STEP 1: Mount or Load the downloaded windows 8 image on your computer
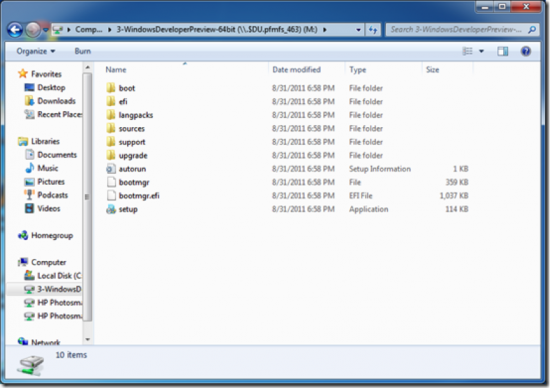
You will need a third party tool when mounting a windows 8 ISO image on your computer since windows 7 or any previous version of Windows lacks the capability to mount such images. You need to download the Windows 8 ISO image from the options listed on Microsoft store or create one yourself using your Genuine DVD, and mount the image on your computer with ISO image software already on your computer. Your page should appear exactly in the image below:

STEP 2 : Format your USB Flash Drive
You may need at least an 8GB USB flash drive for this purpose. Insert your flash drive into your computer . Start the command prompt via your administrator user login and type “diskpart” – this is the command you need to start the disk partition tool needed to format your USB flash drive. Once the DISKPART prompt appears, you can type in the following commands;
DISKPART> LIST DISK
DISKPART> SELECT DISK #
DISKPART> CLEAN
DISKPART> CREATE PARTITION PRIMARY
DISKPART> SELECT PARTITION 1
DISKPART> ACTIVE
DISKPART> FORMAT FS =NTFS
DISKPART> ASSIGN
DISKPART> EXIT.
All these prompt commands execute several functions, for instance DISKPART> list disks– displays the number of active disks available, and DISKPART> select automatically assigns a volume and drive letter to your to your formatted USB drive. DISKPART> select disk# means that # is the identification number of your USB flash drive, DISKPART> clean will help you remove any existing partition available on your USB drive. DISKPART> create partition primary simply creates a primary partition on your USB flash drive. DISKPART> select partition 1 is the command that will select the newly created partition for your USB flash drive.
DISKPART> active will make the newly created partition on your flash drive active, DISKPART> format FS=NTFS will format the USB drive through the NTFS system. DISKPART> assign will automatically assign a volume and a drive letter to your formatted USB drive.
STEP 3: MAKE THE WINDOWS 8 DRIVE BOOTABLE
You need to make your flash drive bootable before you copy your windows 8 files on them. The “Boot sector registration tool” is needed for this purpose – this tool can be found in the already stored windows 8 ISO image.
STEP 3a: Start your command prompt with your administrator log in and type CHDIR into the boot folder where the ISO image is located.
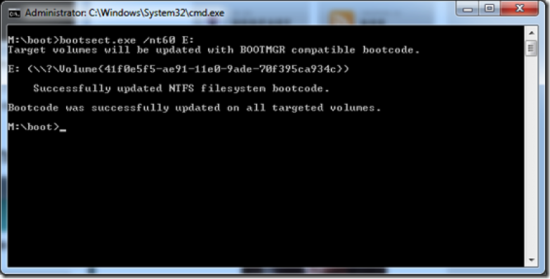
STEP 3b: Type bootsec/nt60 E: ( the E is your assigned drive to the bootable windows 8 flash drive). Once your bootsect.exe completes you will see the image displayed below;

STEP 4: TRANSFER THE WINDOWS 8 FILES INTO YOUR USB FLASH DRIVE
From the command line shown above, you can simply enter XCOPY to transfer the windows 8 files into your bootable flash drive. F:\ is your bootable USB drive.
STEP 5: USE YOUR BOOTABLE FLASH DRIVE TO INSTALL YOUR WINDOWS 8
Your final steps toward making your windows 8 Bootable USB flash drive and installing Windows 8 on your computer are;
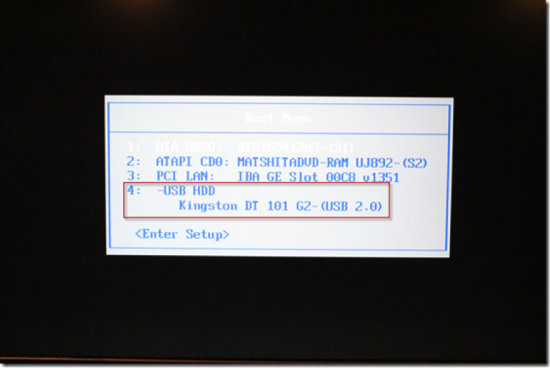
Disconnect and remove your bootable USB flash drive from the computer and insert it into the computer where your windows 8 will be installed. Turn on the computer where the windows 8 will be restored, and let it boot fully. While the computer is booting up, simply select the USB drive to boot from, and follow the remaining instructions to install your windows 8 developer (you may have to make some adjustments to your computer’s BIOS setting in case you cant find the USB flash drive option).
Once you locate your bootable USB flash drive, the image below should come up on your computer screen:

After the completion of the set up and installation of your bootable Windows 8 OS, the image below should show up on your laptop screen;
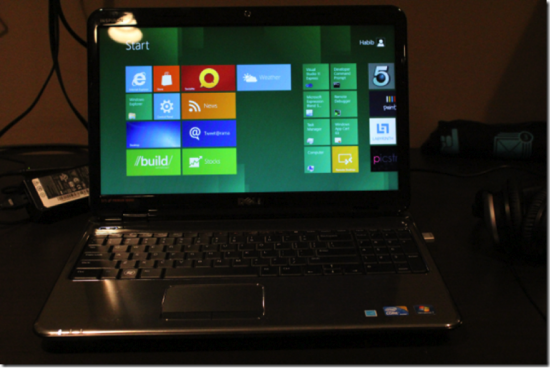
You can personalize your windows 8 once it has been transferred from your bootable USB drive, the fastest possible way is to check your customization settings.