Android market thrived over past couple of years and with every passing day it is getting more intransigent. One of the reasons for the success of Android OS can be attributed to its flexible open source nature . Although, Android OS programming is relatively convenient than other programming languages, it certainly does not mean that you do not need determination, handwork and all the other ingredients to write a successful App.
With huge success of many ideas that turned into apps, many people in-turn are trying their hands on writing an App that would turn out to be a success or any other personally justifiable reasons. Well, like every other thing in this word, writing an app is not a piece of cake and unquestionably, there is no shortcut to a Successful app. Albeit,with effort, time and proper guidance it is possible to write an app and that is where we come in.
Before checking this entire post, you might also want to check the Best Android Apps and Must-Have Games to get a little bit of idea about what’s popular in the app world and what works and what doesn’t.
Tools and Techniques
If you are familiar with JAVA then stepping into Android world is going to be a convenient transition for you and you will have an extra advantage if you are using Eclipse as most of the Android apps are written in Java using Eclipse IDE. Although, there is also a room for stepping down to C but it’s probably best to write an App using Java with Eclipse IDE due to the tooling support provided by Google. Once you have decided on the technique, you can then start assembling tools for writing an app. As of now, these tools are supported on three major operating systems: Windows (XP, Vista, and 7), Mac OS X, and Linux.
You can download these Software tools from the links given below:
Java Development Kit (JDK 5 or JDK 6) – Depending on your Desktop OS you can download your specific JDK from Sun Website.
Eclipse 3.5 (Galileo), A classic Version of Eclipse can be downloaded from here.
Android SDK Tools can be downloaded from Android.com but you need to follow the instructions given below to properly save it for use.
Android Developer Tools (ADT)—Eclipse Plugin, which needs to be installed from inside Eclipse:
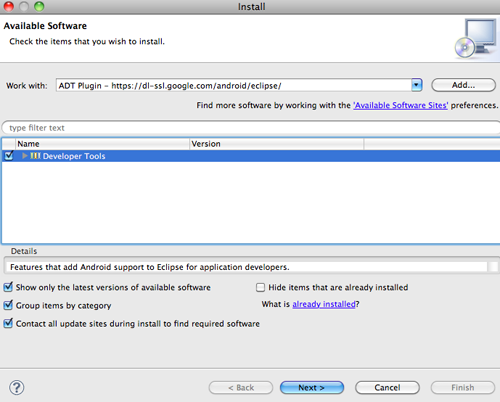
– From the Help menu, click on Install New Software, then select Add.
– In the dialog box, enter ADT Plugin for the Name and https://dl-ssl.google.com/android/eclipse/ in Location; then press OK.
– Select Developer Tools and click Next, and Next again when presented with the items to be installed.
– Read and accept the license terms, and click Finish.
Restart Eclipse once the installation is complete.

Now, you will have to configure the installed plug-in. This can be done by clicking on Window Menu and then selecting preferences . For Mac users, Select Eclipse>Preferences.
From the Menu, Select Android, and then for the SDK Location, browse to where you installed the Android SDK Tools, and select that. Click Apply, then OK.
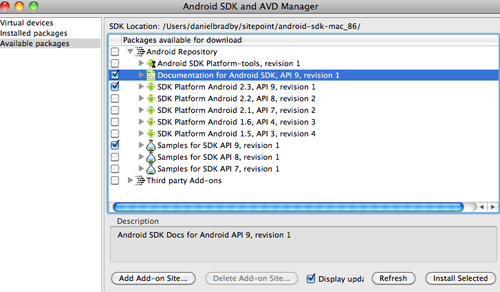
In order to install SDK components, navigate to Window Menu in Eclipse and select Android SDK and AVD Manager. After the manager launches, Select Available packages and navigate to >Documentation, SDK Platform Android 2.3, and Samples for SDK API 9; and click Install Selected.

Getting Started
Net, you require an Virtual Emulator, and as the name suggests, this tool allows you to check and run your Apps on your PC for proof reading or to judge the aesthetics and functioning of your device. To create a personalized Emulator you can set up various Android Visual Devices to check your App on different sized screens and other versions of SDK.
[highlight color=”green”]
Also See: Android Programming Language: Everything You Should Know
[/highlight]
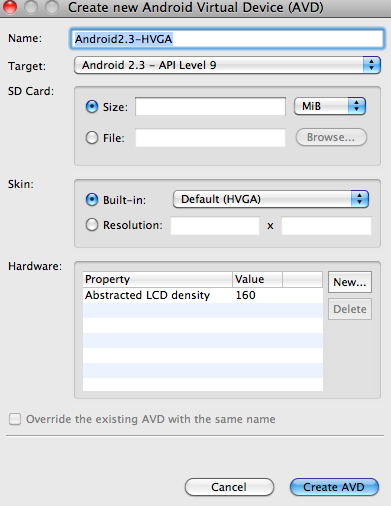
To create one, navigate to Android SDK and AVD Manager and under Virtual Devices click New. You can ten select the AVD target path from a drop down, there are also several options for screen and storage sizes, but for now, you can leave everything as default and click on Create AVD.

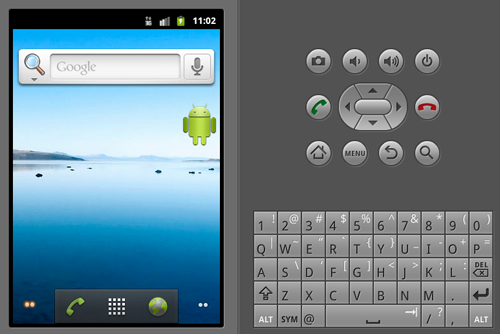
You can now see your AVD up and rolling with some built in apps by clicking Start and then Launch.

Writing an App
After you have successively completed all the above requisites, leave the AVD running and restart Eclipse. Once the reboot is complete, you can then start an Android Project by navigating to File -> New -> Other -> Android and selecting Android Project.
[highlight color=”green”]
Also See: 15 Best Android Books for Developers
[/highlight]
Fill in all the requisites as you desire in the Project and type in the Application names, and finally enter a package name for the app. This package name will serve as a unique Identifier of your App and will also become top-level Java package for your source files. Package identifier is like fingerprint and there can never be same package identifier installed on the phone at the same time, and the same goes true for apps submitted to the Android Market.
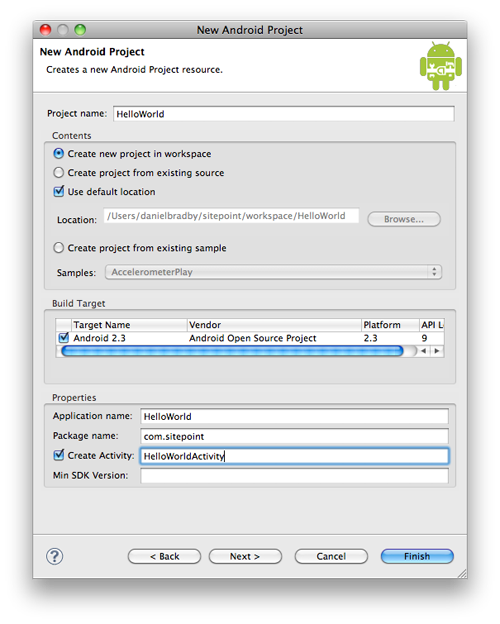

Select Create Activity and provide a name for the Java class that you wish to recognize as an entry point for your app, and click Finish.
You can then go on exploring the contents of the generated project and you will find some Java, XML, and configuration files along the way.
Now , if you are familiar with the terms like Activity, Manifest, Intents you can start Running and debugging your App after you have completed writing the app.
The Final Touch
Assuming your Emulator (AVD) is still working, you can run your Application by Selecting the project in Eclipse, and from the Run menu, click Run; then select Android Application and OK in the dialog.
Now, from the Devices view, you can see any emulators or phones you have plugged into your system that are available to debug apps on. You’ll also be able to see the processes currently running along with your own, identified by the package name you gave your app. If you select the emulator in this view and then move to the LogCat view, you’ll see all the logging that the system has been writing.
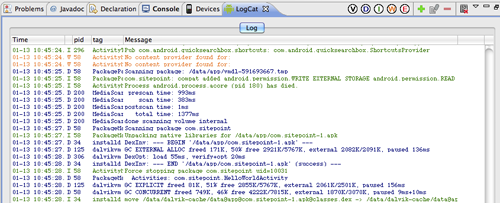

The LogCat View in particular is extremely valuable as it helps you to debug you apps by allowing filter creation, that can be used to switch between different levels of logging.
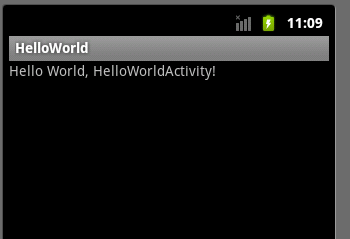
Now, you can navigate to the Emulator, and if everything went fine, you will be able to see you app running just fine and ready to be published on Android Market.

You can Publish your app using your Google Account on http://market.android.com/publish by registering as a developer after you make a life time payment of $25.