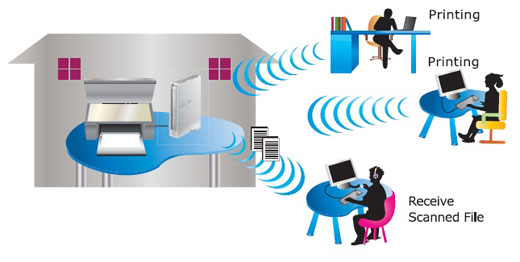
If you have a wireless network, you can connect a wireless printer to this network. This wireless network allows all laptops and computers connected to that network to use the same wireless printer. Since the connection is wireless, the printer can be placed in any convenient location in your office ir home. This also avoid cable clutter.
Now-a-days, wireless printers are in demand just because of it’s ease to carry anywhere and some of its functionalities which makes it more convenient than the traditional printer.
With the help of wireless printer we don’t need to use lots of cables or have multiple printers. A printer doesn’t need to be directly connected with the computer anymore. Now just connect your wireless printer from any hub or network adapter and then access that from your computer. Wireless printers are very useful for small offices and home office (SOHO). Wireless printers can be carried easily from one place another.
So, now, when you want to take a printer consider buying a Wi-Fi printer. WiFi wireless printers can now be purchased for less than $50.00.

Setting Up a Wireless Printer:
To setup or install a wireless printer you can follow below steps :
1. If you are going to setup a wireless printer for your computer or network adapter or switch or hub, please be sure for two things to be available
- First is Printer name or SSID of your network
- and the password if the network is secured and password protected.
2. You need to keep in mind while doing the setup of a wireless printer is to place a printer next to your computer or network hub or switch or network adapter.
Find the Network SSID and Password:
To find your network name and password, go to the computer or laptop which is connected to network or internet. Simply go to the network settings and left click on the wireless-connection in the system, the name of the network should be mentioned there.
Right click on the current connection then go to “properties“. Select the security tab and click on the checkbox named “show characters” and you will get the password of your network .
On a Mac computer or laptop, go to the utilities then keychain Access. There under the passwords select the network name. Then right click on the current connection and select properties and then choose the show password option. It will show you the password of network.
If you don’t want to follow the above points then just go to router’s web configuration pages, open a browser and type IP address of your wireless router in the URL bar. You will find the default IP address but some most common are 192.168.1.254 (ATT 2Wire) and 192.168.1.1 or 192.168.0.1 (Linksys, Netgear, D-Link, and the like).
When you get the network name and password, go ahead with the installation process:
Automated Installation:
When you click on the printer, it will automatically detect the internet connection and ask for the password of the network. When you enter this, it automatically gets connected to the printer. This is called automated installation.
Manual Installation:
Step 1: If you want to install printer manually you need to know the IP address. So keep your IP address ready.
Step 2: In this case, your IP address will contact the printer via network. But if you have a secure or high level of firewall setting it will prevent you to install printer by preventing the communication between your computer’s IP address and printer. So, disable the firewall to overcome from the problem or you can turn security level low on your router.
Installing Without a CD:
Wireless printer can also be installed without using the CDs provided with the printers. You just need to add printer to your operating system using the “Add A New Printer” routine of your operating system. For this, printer needs to be connected to the network.
If a printer is connected to the network, your computer’s printer search option will find the printer and will install the drivers for your computer. In case this process fails, you need to download the drivers from the website of the printer’s vendor.
Or, if printer searching process was not able to find any printer then add the printer as a local printer. And then identify it to a standard TCP/IP port. For this, you need to know the IP address of printer or device name.
These were the simple steps to setup and install a wireless printer on your Windows PC and we hope you were able to add the printer.