Remote desktop function is disabled by default in your PC, however, you can easily configure your PC to enable it and then you can use it to connect to other PCs. Remote connection in Windows is the way to access one PC from another PC by just entering PC IP address and password. In this situation, a Computer will be Home computer (which you want to connect) and other will be a client computer (from which you want to connect the home computer).
Before explaining the different tips using which you can enable the feature of remote desktop feature, it is important to understand what exactly this feature means and how it can be of help.
What is Remote Desktop Feature?
Sometimes it is not possible to be at a PC as you may have some other work elsewhere. However, you may be in need to access the systems as you want some files which you have stored there. In such cases, it is the remote desktop feature which allows you to control and access data of another computer from your own computer. It is used in a lot of offices where administrator can access all other sub computers from its own system rather than heading to each monitor separately.
Hence, it is one of the best ways of gathering special privileges and monitoring the activities and accessing information from a system where you are not physically present. It is important to note that this feature is present only in business, professional and ultimate version of windows and is absent in the home version.
Configuring the Remote Desktop Feature
There are two ways of getting to the settings for remote desktop and we will list both of them. You are free to choose whichever option you wish to.
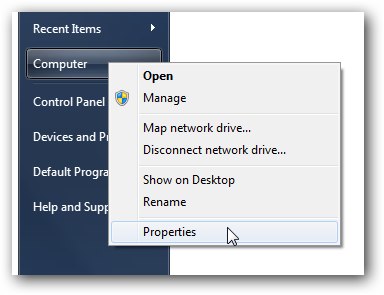
Right Click on the computer icon on your desktop. Head over to the properties tab and click on it as shown in the picture below.

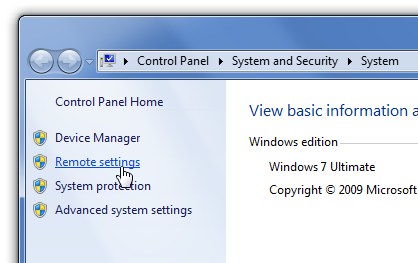
A window pops where you need to hover to the left hand side and click on remote settings.
Alternately, you can also open the start menu and click on control panel directly.
Now, in the control panel, head to system and security settings as shown in the below picture.

The dialog box that opens is very similar to what you would have found on clicking on the properties tab in the computer icon.
So, after you have chosen either of the above method and clicked on the remote settings, you then need to follow the following steps.
A new dialog box opens which has the different system properties listed below. There is an option entitled remote assistance.
A checkbox entitled “allow remote assistance connections to this computer” is present as shown in the below picture. Click on the checkbox as checking this option will enable the remote desktop server.
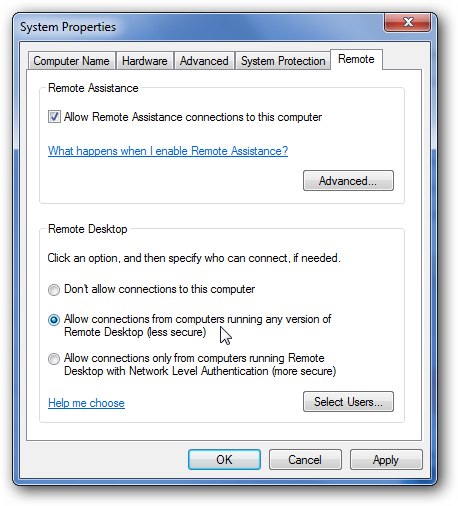

There are three options present in the bottom half of the screen as you can see in above picture.
You have to click on the third option as it will then allow you to connect to the PC in the remote mode.
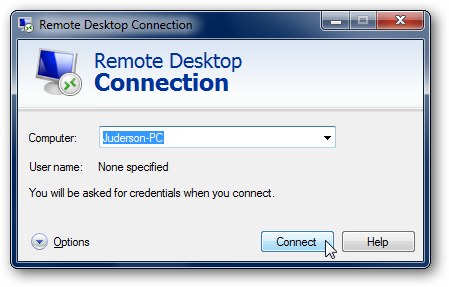
These are the simple steps that you need to follow. In order to access the computer in the remote mode, you would need either the IP address of the PC to which you want to connect or the name of the computer.

To obtain the name of the computer, you can right click on your computer and upon clicking the properties option, the dialog box that appears would bear the name of the computer.
Also, obtaining the IP address is relatively simple as following these steps will help you find the correct IP address.
Click on network and internet in control panel section. Open network and sharing center, click on local area connection.
In the dialog box that opens, click on properties. A new dialog box opens. Choose the option entitled internet protocol version 4. Double clicking the option will open a new screen here the IP address would be listed.
So, after you have obtained the IP address you can then use the PC in the remote mode and access full control of the PC.
If you have an Ubuntu, you can check How to Enable Remote Desktop in Ubuntu as well.